 Loading... Please wait...
Categories
Using Schmartboard with Arduino: A Step-by-Step Guide
Posted by Schmartboard on Apr 19th 2025
Arduino has revolutionized DIY electronics by making microcontroller programming easy and accessible. Whether you're building a smart home device, a wearable, or a robot, one thing remains true: prototyping can be messy without the right hardware.
That’s where Schmartboard comes in.
Schmartboard offers a series of solderable and solderless prototyping boards that make it easier to integrate surface-mount components (SMDs) with your Arduino projects. This guide will walk you through how to use Schmartboard with your Arduino setup—step-by-step.
? Why Use Schmartboard with Arduino?
When you're building a prototype or custom circuit to work with an Arduino, you’ll often run into the challenge of integrating SMD chips or complex circuits. Schmartboard makes this process faster, more reliable, and cleaner. Here’s how:
-
Solder surface-mount parts easily using Schmartboard's patented technology.
-
Use pre-routed traces to avoid wiring errors.
-
Create compact, robust prototypes compatible with breadboards or permanent setups.
-
Transition from breadboarding to production seamlessly.
-
Arduino Board: Choose your preferred model (e.g., Uno, Mega).
-
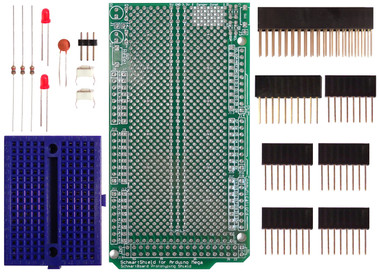
Schmartboard Arduino Shield: Select a shield that matches your project requirements:
-
Surface Mount Prototyping Shields: Ideal for integrating SOIC components with various pitches.
-
Through-Hole Prototyping Shields: Perfect for traditional components and general prototyping.
-
-
Additional Components: SMD or through-hole components as per your project design.
-
Tools: Soldering iron (if soldering), jumper wires or header pins, breadboard (optional for testing), USB cable, and Arduino IDE.Schmartboard+1Schmartboard+1

? Step-by-Step: How to Use Schmartboard with Arduino
1. Plan Your Circuit
Sketch out your circuit design, noting where each component connects to the Arduino. Decide if you’re using a Schmartboard just for one IC or for a full custom circuit.
2. Choose the Right Schmartboard
Schmartboard offers boards for:
-
SOIC, SOT23, SC70, and more
-
Passive components like 0603, 0805, and 1206
-
Custom layouts with headers and power buses
3. Mount and Solder Components
If you're working with SMDs:
-
Align your IC or component with the pre-routed grooves.
-
Use the provided solder channels and a soldering iron to secure the pins. (Schmartboard makes it easy—even for beginners!)
4. Connect to Arduino
-
Use jumper wires or headers to connect your Schmartboard-mounted components to the correct pins on your Arduino.
-
Pay close attention to voltage levels, ground, and logic pins.
5. Upload and Test
-
Upload your Arduino sketch through the Arduino IDE.
-
Monitor serial output and test your component behavior.
-
Make adjustments or rework as needed.
✅ Pro Tips
-
Label your Schmartboards for easy reuse.
-
Combine Schmartboards with standard breadboards for hybrid prototyping.
-
Use Schmartboard’s EZ Soldering Kits to practice your skills if you’re new to surface-mount soldering.
? Final Thoughts
Combining Arduino and Schmartboard is a powerful way to elevate your DIY electronics. Whether you're an engineer, hobbyist, or student, Schmartboard helps you make cleaner, more reliable prototypes and bridges the gap between breadboarding and real-world applications.
So the next time you’re integrating a surface-mount chip or building a compact project—reach for Schmartboard.
Recent Posts
- » Do Inspect Solder Joints Under Magnification for Intermittent Issues
- » Don’t Assume Power Supplies Are Perfectly Clean
- » Do Choose the Right PCB Stack-Up Early to Support Signal Integrity
- » Do Route High-Frequency Signals with Controlled Impedance
- » Don’t Overcrowd the Board — Leave Room for Debugging
