 Loading... Please wait...
Categories
How to Interface Sensors with Microcontrollers
Posted by Schmartboard on Jun 18th 2025
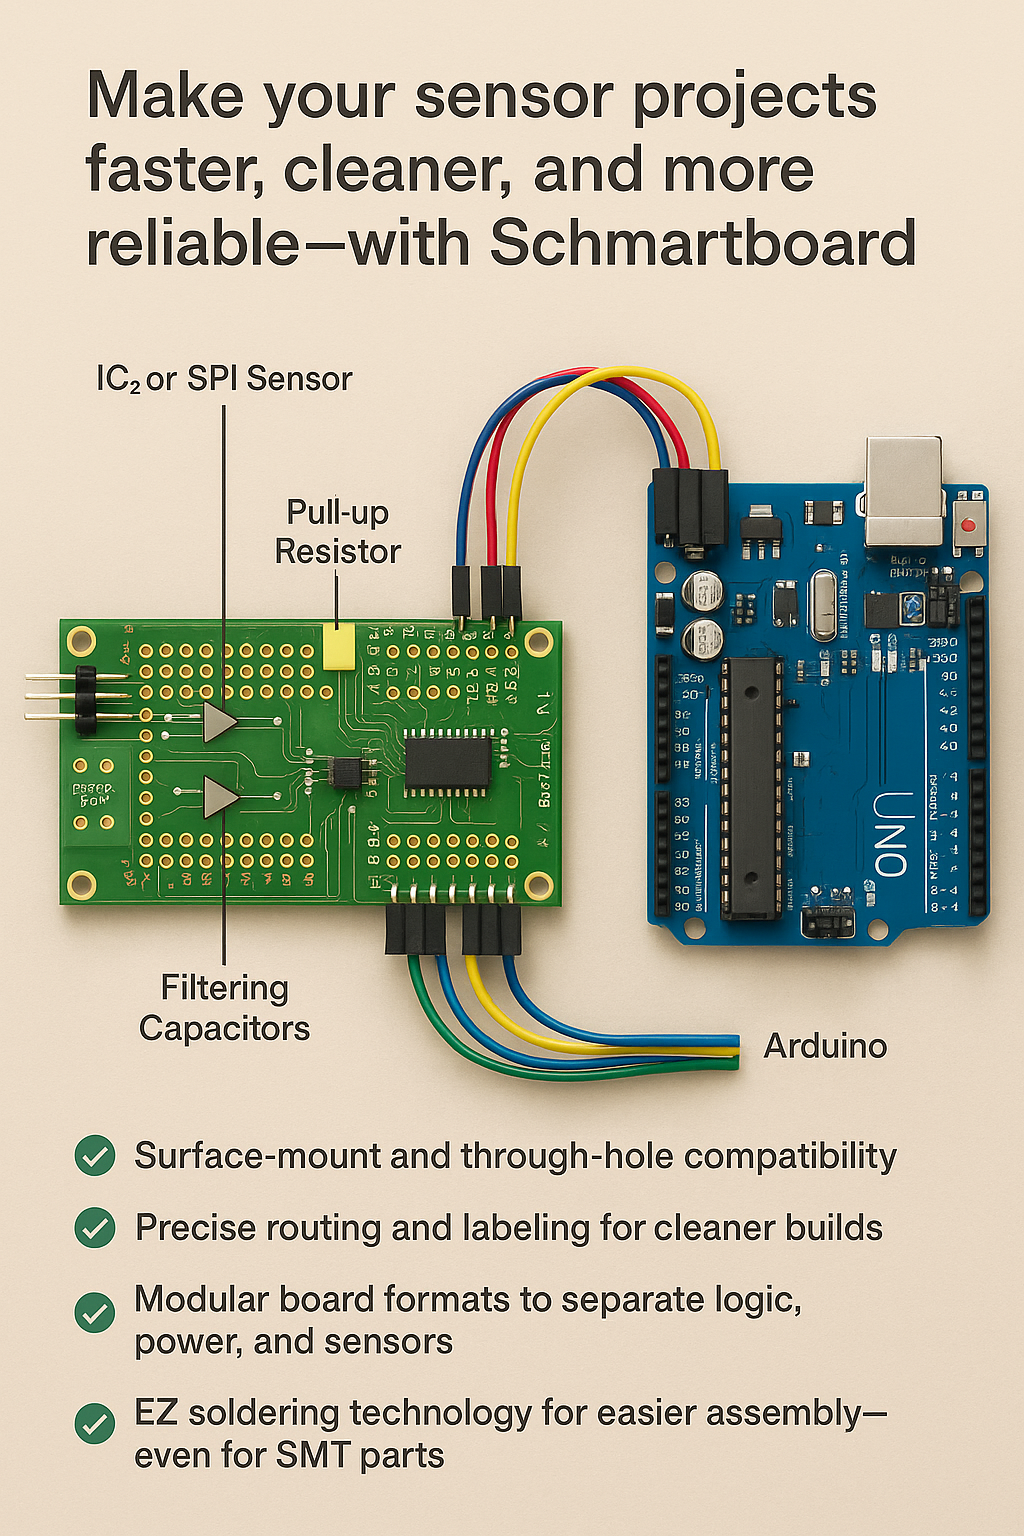
Make your sensor projects faster, cleaner, and more reliable—with Schmartboard
Whether you're monitoring temperature, detecting motion, or measuring light levels, interfacing sensors with microcontrollers is a core skill in electronics and embedded systems development. Sensors allow microcontrollers to perceive the physical world and respond intelligently—and the right tools can make the process much more efficient.
In this post, we’ll walk through key concepts for connecting sensors to microcontrollers—and highlight how Schmartboard products help you prototype clean, professional-grade systems with ease.
Step 1: Understand the Sensor Type
Sensors come in a variety of types, and how you connect and read them depends on their output:
-
Analog Sensors (e.g., potentiometers, thermistors): Output a variable voltage proportional to a physical condition. These connect to ADC (Analog-to-Digital Converter) pins on the microcontroller.
-
Digital Sensors (e.g., PIR motion sensors, magnetic switches): Output HIGH or LOW signals that are read by GPIO (General Purpose Input/Output) pins.
-
I2C or SPI Sensors (e.g., accelerometers, temperature sensors): Communicate through digital protocols that require data and clock lines (and sometimes chip select or address lines).
Step 2: Power the Sensor Properly
Most sensors operate at 3.3V or 5V, depending on the model. Always check the sensor’s datasheet. Some microcontrollers output both voltages; others may require voltage regulators or logic level shifters.
? Pro Tip: Schmartboard’s prototyping platforms allow easy integration of voltage regulators, logic level converters, and power rail filtering capacitors, ensuring your sensor is powered safely and cleanly.
Step 3: Read the Sensor Data
How you read the data depends on the type of sensor:
-
For analog sensors: use
analogRead()on an Arduino, or ADC libraries in other microcontrollers. -
For digital sensors: use
digitalRead()or attach interrupts. -
For I2C/SPI: use libraries (like Wire for I2C) and define addresses/pins accordingly.
Schmartboard’s clear trace layout and labeled pads make it easy to route sensor data lines to the correct microcontroller pins—without the wire mess of traditional breadboards.
Step 4: Add Pull-Up or Pull-Down Resistors (If Needed)
Some digital sensors require pull-up resistors (common in I2C), or pull-downs to ensure stable default states. Failing to add these can result in noisy or floating signals.
Schmartboard makes it easy to solder surface-mount or through-hole resistors directly into the circuit without needing custom PCBs or bodge wiring.
Step 5: Filter and Protect
To ensure reliability, especially in noisy environments, consider:
-
Adding capacitors to filter power supply noise
-
Using series resistors or diodes for signal line protection
-
Shielding cables for long-distance runs
With Schmartboard, you can easily integrate these components onto a compact, modular board with professional-quality layout.
Why Use Schmartboard for Sensor Prototyping?
Here’s what makes Schmartboard ideal for interfacing sensors with microcontrollers:
✅ Surface-mount and through-hole compatibility
✅ Precise routing and labeling for cleaner builds
✅ Modular board formats to separate logic, power, and sensors
✅ EZ soldering technology for easier assembly—even for SMT parts
✅ Compact, professional-grade boards that eliminate jumper-wire spaghetti
Whether you're building a DIY weather station or prototyping an IoT device, Schmartboard provides the perfect foundation to bring your ideas to life.
Final Thoughts
Interfacing sensors with microcontrollers is easier than ever—when you use the right tools. Clean power, good signal management, and smart layout choices are what separate fragile hacks from robust prototypes.
Recent Posts
- » Do Inspect Solder Joints Under Magnification for Intermittent Issues
- » Don’t Assume Power Supplies Are Perfectly Clean
- » Do Choose the Right PCB Stack-Up Early to Support Signal Integrity
- » Do Route High-Frequency Signals with Controlled Impedance
- » Don’t Overcrowd the Board — Leave Room for Debugging